How to Call StarfishETL APIs from Creatio


If you are looking for a way to automate the push of data from Creatio CRM to another system using StarfishETL’s Designer (recently renamed Cloud Cartographer), you've come to the right place. We assume that you are already familiar with Creatio System Settings, Web Services, and Business Processes, as well as creating jobs in StarfishETL. You may want to keep the StarfishETL API documentation handy for this task.
If you are not familiar with these concepts in Creatio, refer to the documentation below:
For Creatio, there are three main steps:
For this to work, we will need to store the username and password for StarfishETL in Creatio’s System Settings. The StarfishETL credentials used MUST be that of the owner of the of the StarfishETL instance (the user who created the account). Member accounts will not work. By default, only Creatio users with the System Administrators role will have access to System Settings, Web Services, and Process Library. Look into using Access Permissions if you wish to strengthen security for these credentials even further. Refer to Creatio's documentation for more information about Access Permissions.
In Creatio, go to the System Settings section and add new settings for the StarfishETL Username, Password, Project Id, and Job ID for StarfishETL. Give them a name, a meaningful Code, set Type to Text and enter the respective values in the Default value field.
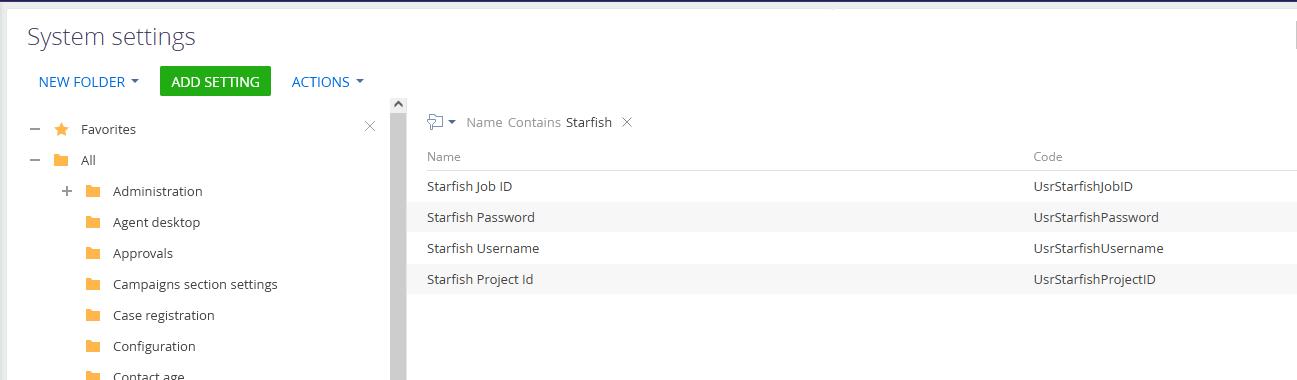
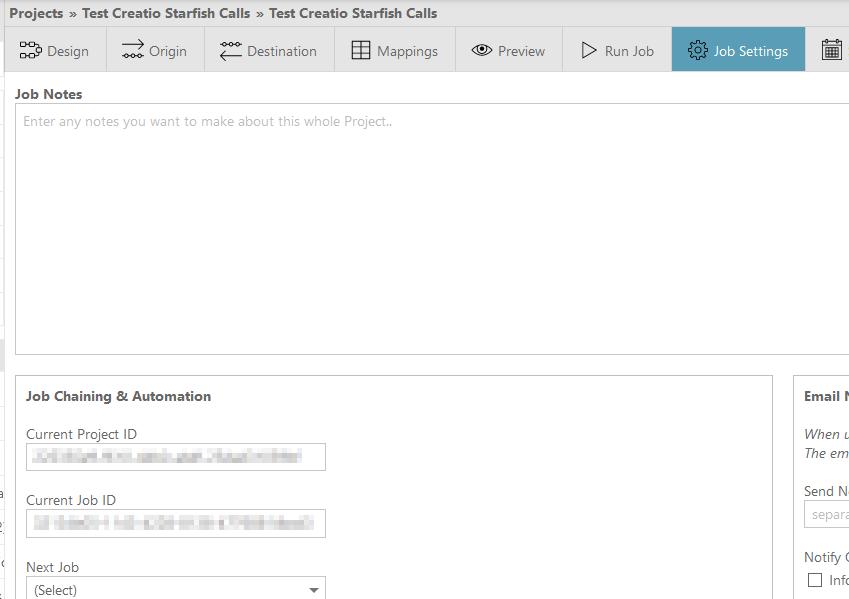
For the ProjectID and JobID refer to your StarfishETL Job Settings tab.
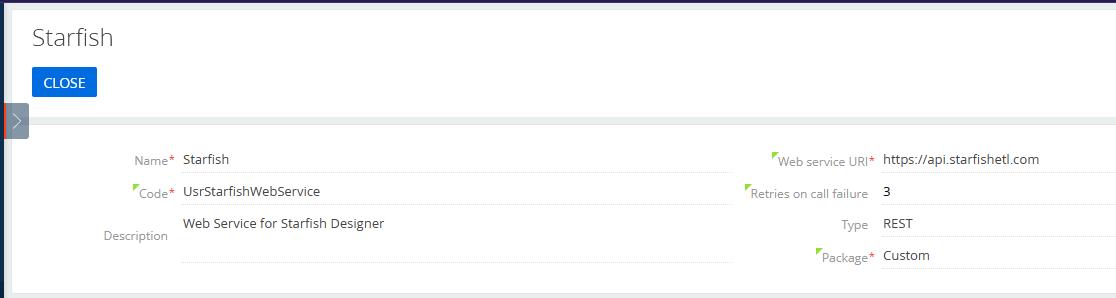
In the Studio workplace Web services section, create a new REST service. Use https://api.starfishetl.com for the web service address. You may want to edit the Code field to something more meaningful so that it is easier to identify in the future. You may also want to increase the number of retries and add a description.
You will need two methods: one to authenticate and one to call the StarfishETL job.
StarfishETL requires authentication before you can call one of its jobs. Note that StarfishETL only accepts x-www-form-urlencoded for authorization at its /v1/token endpoint. At the time of writing, Creatio does not have this option available in web services. Instead use the /v1/GetToken endpoint which accepts requests in JSON.
Click on the plus sign in the Web service methods detail and fill in the header fields. I recommend changing the value in the Code field to something descriptive. Make sure the Request type is set to POST. The Complete address field should fill in automatically once you’ve entered /v1/GetToken in the Method address field.

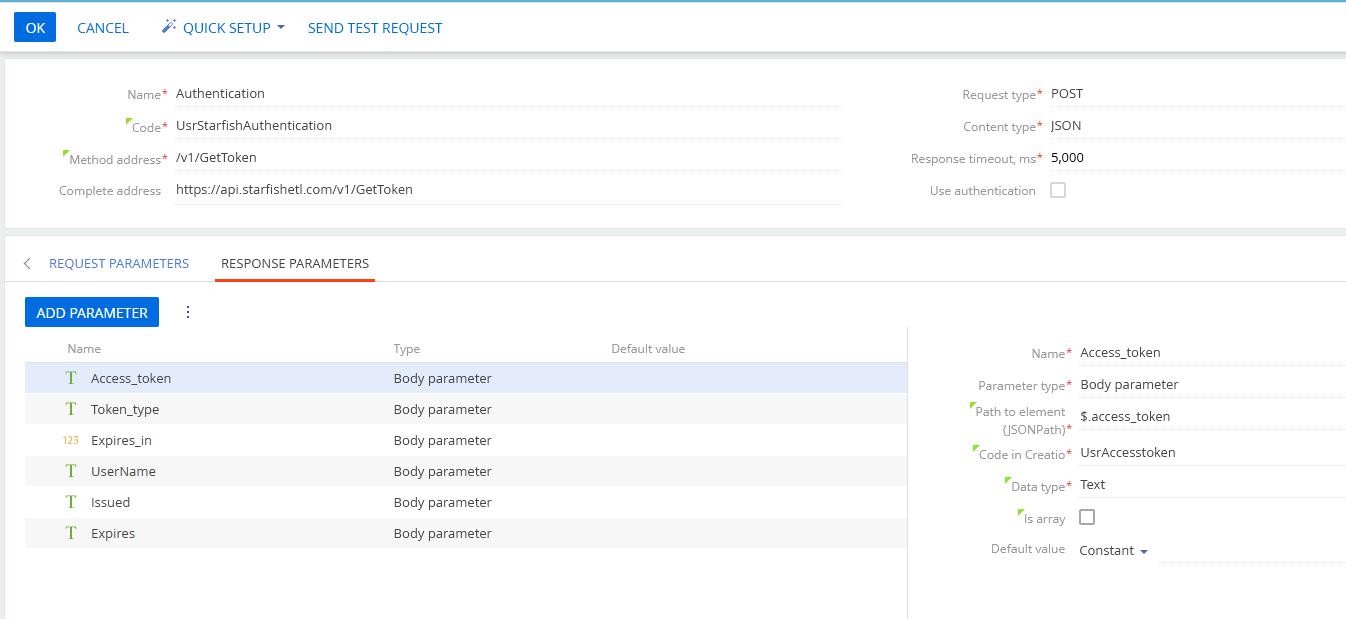
Next, add the request and response parameters to the method. Click the Add Parameter button under the Request Parameters tab. Add the following request parameters making sure that for each parameter the Parameter Type is set to Body Parameter and the Data type is Text. The table below is also available in StarfishETL’s API documentation.

Set the Default value of grant_type to a Constant and enter ‘password’ (without quotes). For testing purposes, use the System Settings created earlier as the default values for username and password.

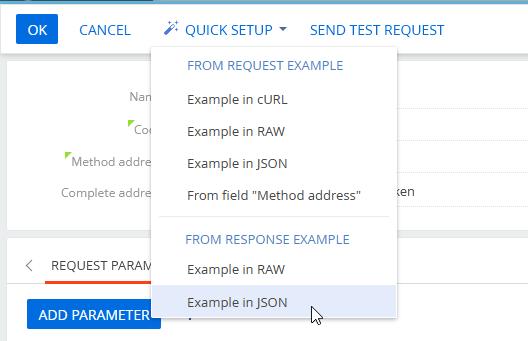
For the response parameters, you could enter them manually, but there is a quicker way. Click the Quick Setup menu > From Response Example > Example in JSON.
A popup titled, Response body setup from JSON example, should appear. Copy/paste the response example below into the popup, click the Next, and Save buttons. You can also find a similar example in StarfishETL’s API documentation:
{
"access_token": "jABIWOVxnl88OhuS1QeRNZlITzY8l6y7...",
"token_type": "bearer",
"expires_in": 431999,
"userName": "example@example.com",
"issued": "Mon, 22 Aug 2022 15:36:28 GMT",
"expires": "Sat, 27 Aug 2022 15:36:28 GMT"
}
The results should look like the following:
Next click the OK button, then the Save button on the Web Service level.
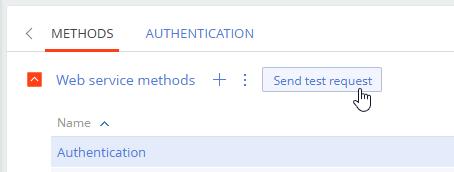
Click the Send test request button making sure that the method you want to test is highlighted. A pop up will appear showing the values for Request Parameters you are about to send. Next, click the green Send Request button. Note that the username and password from the System Settings are exposed on this step. After testing, you can clear these values from the UserName and Password Default values. Alternatively, you may want to use Creatio Access Permissions so that only trusted users may see Web Service.
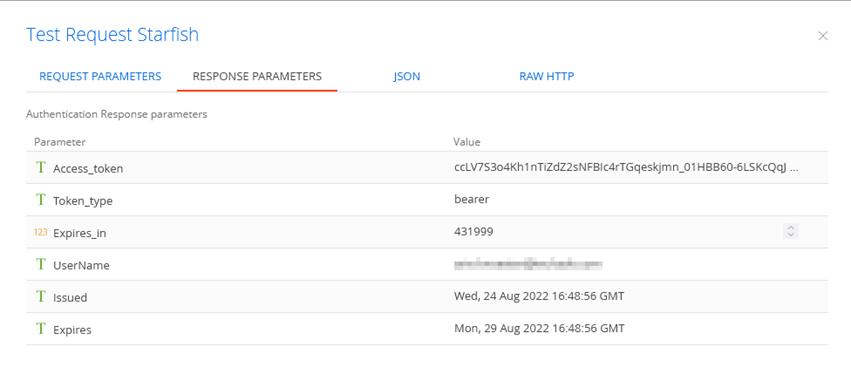
A successful test should look like the following:
Repeat the steps you followed for authentication and create a method to execute a StarfishETL job. Starfish has two endpoints available depending on your needs, /v1/ExecuteJob and /v1/ExecuteJobAsync. More information about these can be found in the documentation. See the respective pages for the endpoint you choose for examples of request and response JSON you can use to copy/paste into Creatio’s Quick setup function.
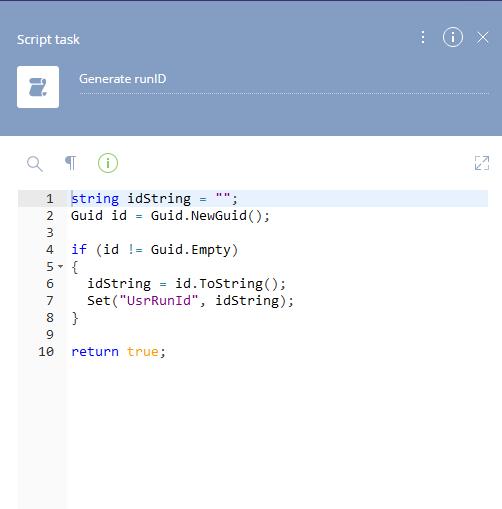
The RunID can be any valid GUID. For testing purposes, there are free sites available that generate GUIDs.
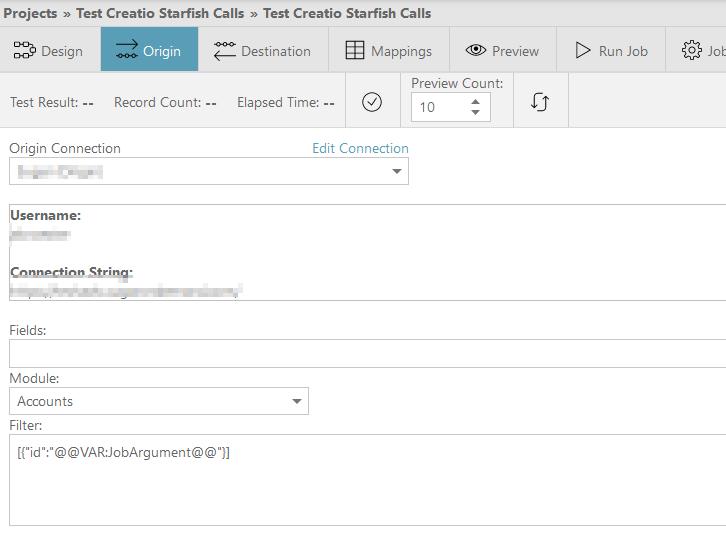
For the Argument parameter, refer to the Starfish API documentation for the endpoint you chose for more information. This could be a Creatio record ID. It is also possible to pass whole JSON objects into the Argument parameter. In your Starfish job, you can receive the Argument parameter in a special variable, @@VAR:JobArgument@@, in the Origin filter. The image below shows one example, but the way this is implemented may change depending on your Origin connector.
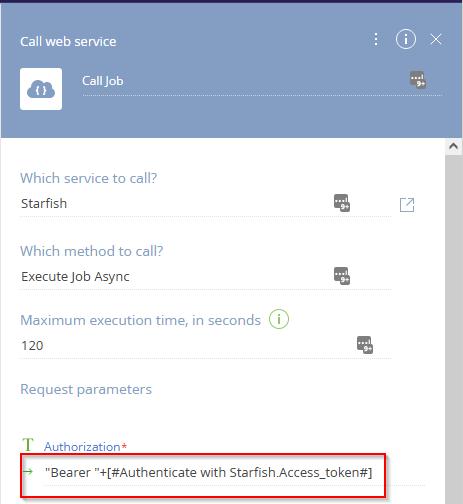
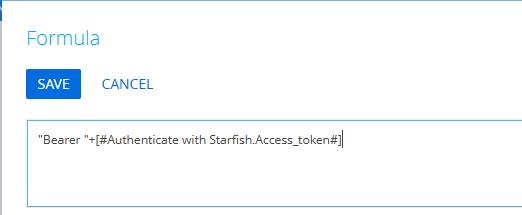
Whichever endpoint you use, you MUST add an additional parameter for Authorization in the method used to execute a StarfishETL job. This Authorization parameter will be set to the Access Token received from the Authorization method you created first.
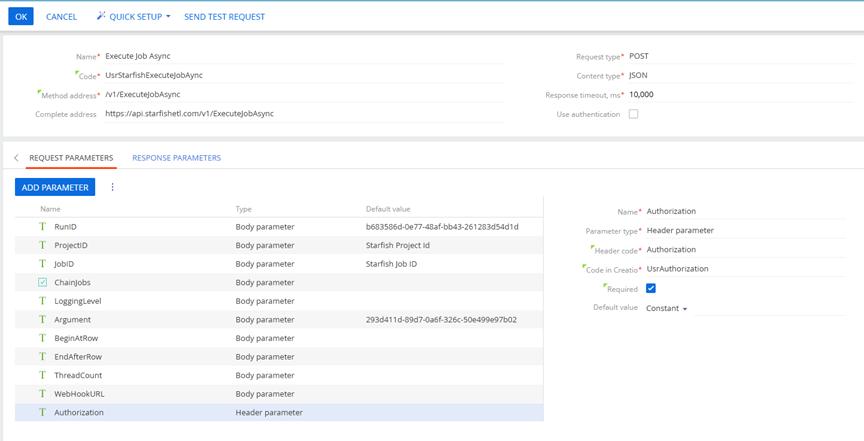
If you use the Quick setup function to enter the request parameters for the Execute Job method, make sure that the Data type is Text for the LoggingLevel parameter. Creatio may misinterpret this parameter as an integer. This will cause an ‘Input string was not in a correct format’ error.
Run the Authorization method you first created and copy the Access Token received. It may be easier to do this from the JSON or Raw HTTP tab.
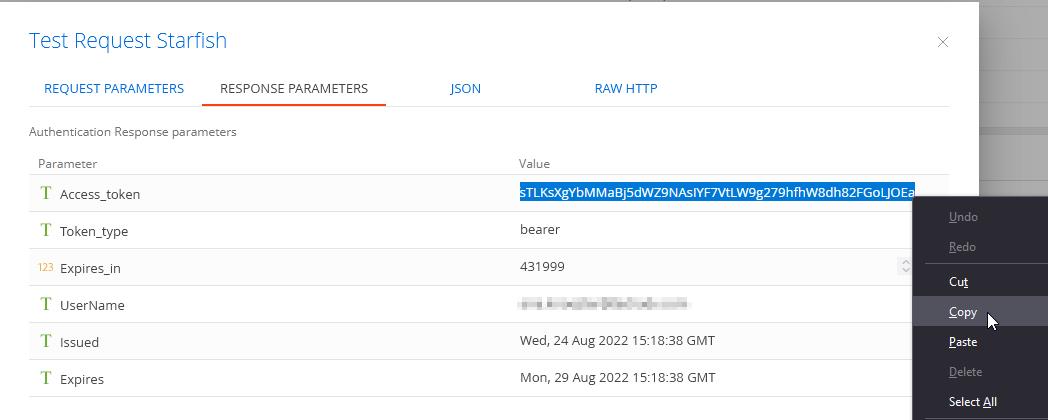
Then send a test request for the Execute Job method, add ‘Bearer’, a space, and paste the Access Token into the field.

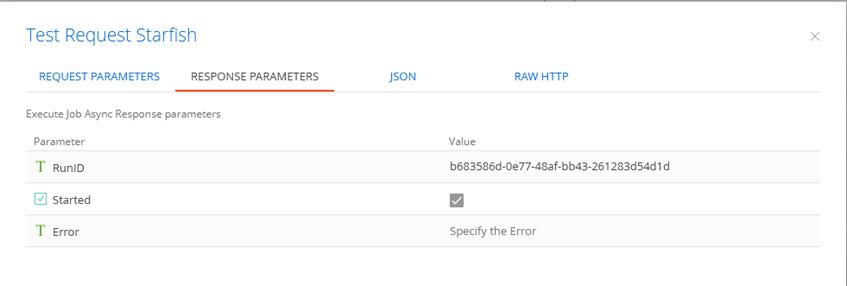
For this example, since I chose the ExecuteJobAsync endpoint a response should be returned within a few seconds.
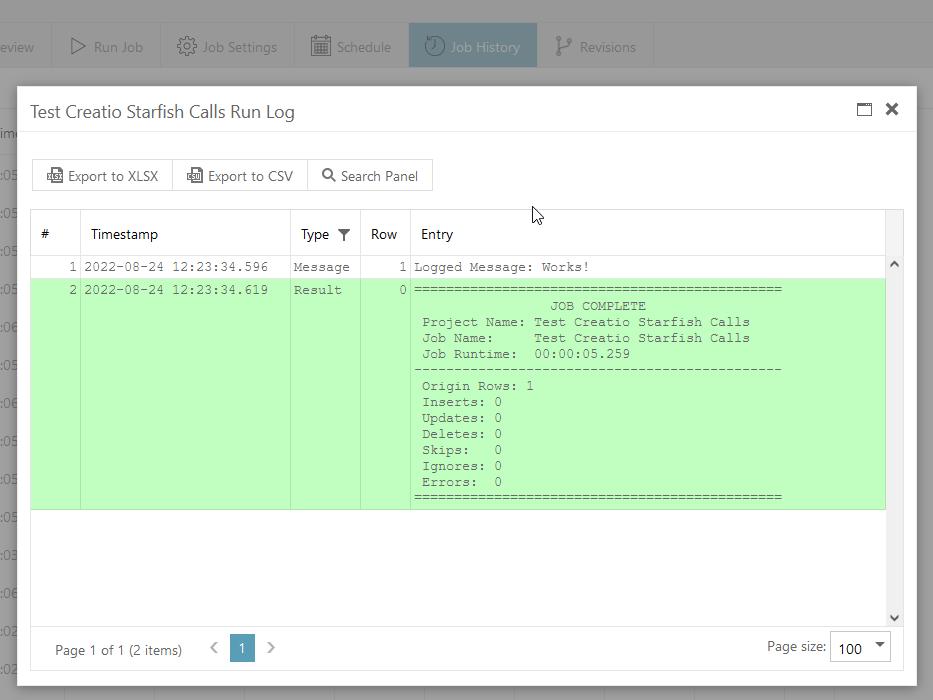
To verify the job was triggered in StarfishETL, check the Job History tab. In this example, I called a dummy job that simply prints a statement in the log.
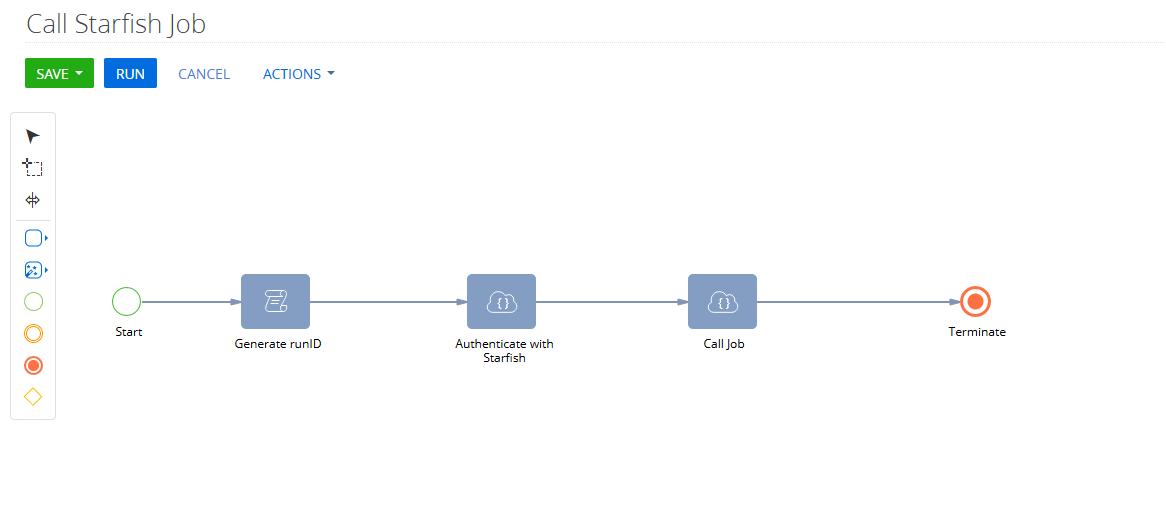
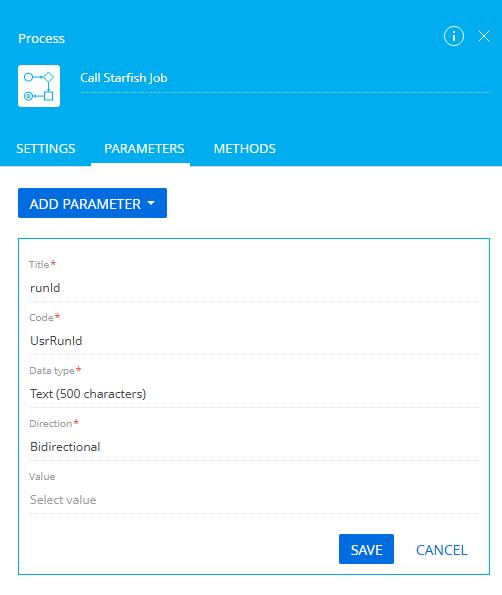
Now that you have successfully created the Web Service and Methods, it’s time to use these in a Business Process. If you are already familiar with Business Processes, then this step should be straightforward. You’ll need some sort of starting condition, a Script Task element to generate a Run ID, two Web Service elements for the Authorization and Execute Job methods, and a Parameter for the Run ID. Remember to use the System Settings you created for the appropriate values. Below is a simplified example. Of course, you could expand this based on your needs.
When configuring the Web Service element that uses the Execute Job Web Service Method, it should get the Authorization parameter from the Access Token received from the Authorization element.
Congratulations, now you can trigger StarfishETL jobs from Creatio!
Fill out the form below and we will contact you